
How to Clean Earbuds Safely: Remove Earwax, Dust, and Grime Without Damage
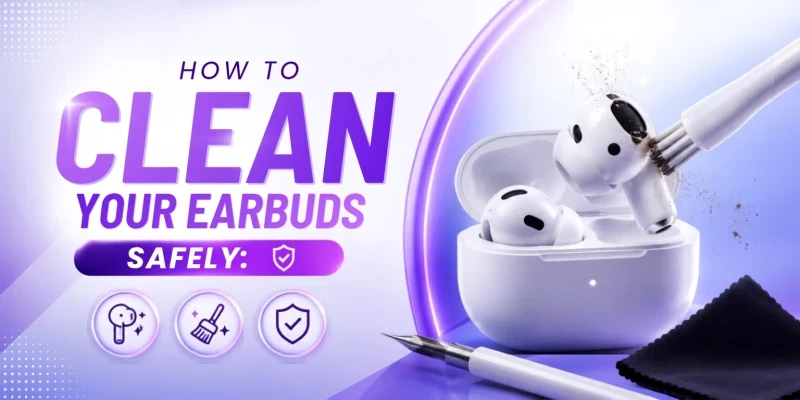
Earbuds sit inside your ear canal for multiple hours a day. So they pick up earwax, sweat, and dust whether you notice it or not. Most people only think about cleaning them once the audio already sounds off, one side quieter, bass gone thin, calls sounding like they're coming through a wall. The good news is that a blocked speaker mesh is usually the cause, not a dying driver, and it takes five minutes to fix with the right method.
Cleaning can restore muffled sound and improve charging reliability, but maintenance is only one part of choosing and using earbuds correctly. Our complete earbuds buying guide in Bangladesh explains sound quality, fit, battery life, ANC, microphones, and price ranges.
Why Cleaning Your Earbuds Matters
There is a tiny mesh on an earbud that protects the driver. It is the small speaker that vibrates to produce sound. When wax or dust builds up on that mesh, it acts as a filter and blocks some part of the sound wave before reaching your ear. Higher frequencies get filtered out first because their wavelengths are shorter, which is why a dirty earbud tends to sound muffled and bass-heavy rather than just quieter overall. You just have to clean the mesh, and that missing detail usually comes right back.
Regular cleaning also improves hygiene. Especially if you use them for extended periods after a workout, earbuds can transfer skin oils and microorganisms. You can clean your ear tips and outer surfaces to decrease irritation so long as you do not insert swabs, tools or even liquid into your ear canal. Cleaning also supports better hygiene, especially after workouts or long listening sessions. Read our guide on how to use earbuds safely and reduce the risk of irritation, excessive sound exposure, and poor hygiene habits.
Before You Start: Check the Manufacturer’s Instructions
Not all earbud wet-cleaning methods are safe for every device. Certain manufacturers permit a slightly damp cloth or certain solution on specific surfaces, while others go as far as discontinuing any and all use of alcohol and chemical cleaners. Some models even recommend how to clean the mesh differently. If you are going to use any liquid method namely water or alcohol or cleaning putty, search your exact earbud model on the support page.
Turn the earbuds off and disconnect them from power.
Remove detachable silicone or foam tips before cleaning the earbud body.
Work over a clean, dry surface with good lighting.
Use the driest method first and add moisture only when the manufacturer permits it.
Never place damp earbuds in the charging case.
How Often Should You Clean Earbuds?
There is no universal weekly schedule for every user. Cleaning frequency depends on how often you wear the earbuds, how much you sweat, the ear-tip material, and the environment.
• Wipe the ear tips with a dry cloth after every use, especially in our country’s heat and humidity where sweat builds up fast.
• Do a proper mesh and case cleaning once a week if you use your earbuds daily.
• Gym-goers and commuters should check the mesh every few days, since sweat carries wax and dust deeper into the speaker grille.
• Deep clean the charging case and pins once a month, even if the earbuds themselves look fine.

Safe Cleaning Tools
|
Tool |
Best Use |
Important Caution |
|
Soft, lint-free microfiber cloth |
Outer housing, case, and dry ear tips |
Do not push cloth fibres into ports. |
|
Clean soft-bristle brush |
Dry debris on mesh and openings |
Use light pressure; avoid metal or wire bristles. |
|
Dry cotton swab |
Case grooves, sensors, and contacts |
Do not insert it into the speaker or microphone
holes. |
|
Fresh or distilled water |
Only for removable tips or approved methods |
Use only when the manufacturer allows it. |
|
70% isopropyl alcohol |
Selected exterior surfaces or case on some models |
Not universally safe; avoid mesh unless specifically
approved. |
A basic kit is enough for most cleaning jobs. Choose simple tools and avoid anything designed to scrape inside small openings.
How to Remove Earwax Safely
You should start with dry cleaning first. Hold the earbud with the speaker mesh facing downward and tap it gently against your palm; a surprising amount of loose wax falls out on its own. Next, run the soft brush across the mesh in one direction, brushing outward and away from the speaker rather than pushing debris further in. If there is wax, dampen a cotton swab very slightly with water or a drop of isopropyl alcohol and just lightly dab; don't scrub at the edge of the mesh. You should never insert anything into the mesh holes. The wire behind that mesh is thinner than a human hair, and one wrong poke can leave a permanent dent.
How to Clean Earbud Mesh
People end up doing the most damage to their earbuds trying to clean the mesh. Usually, they try to reach for a pin or a needle because the brush isn't getting into the holes. You must resist that urge. You need to keep the earbud tilted downward throughout the process so that gravity helps pull debris out rather than pushing it toward the driver. A few short brush strokes, followed by a light puff from the air blower, clears out most buildup. If the mesh looks discolored but sound is fine, leave it; cosmetic residue doesn't affect performance the way blocked holes do.
How to Clean Silicone and Foam Ear Tips
Silicone tips can be removed and washed. Pull them off gently, rinse under running water with a tiny amount of mild soap, and rub the inside with a fingertip to clear out oil buildup. Let them air dry completely, at least a few hours, before pushing them back onto the earbud; trapped moisture inside the nozzle can travel into the driver. Foam tips work differently. They absorb liquid and hold onto it, so washing them is a bad idea. Wipe foam tips with a barely damp cloth and replace them every two to three months since they degrade with sweat and oil over time regardless of how well you clean them.
How to Clean the Charging Case
Dust collects in the hinge, the lid seal, and around the earbud slots. Use the soft brush to sweep loose particles out of the slots first, then wipe the interior and exterior with a dry microfiber cloth. For grooves the cloth can't reach, a dry cotton swab works better than a brush since it won't leave loose bristles behind in the case.
How to Clean Charging Contacts
For your earbuds to charge reliably, you must keep the metal charging pins, both on the earbuds and inside the case, free of oxidation and grime. Use isopropyl alcohol to clean the tips. Dip a cotton swab in a small amount of 70% isopropyl alcohol, squeeze out the excess so it's barely damp, and wipe each contact point. Isopropyl alcohol evaporates fast and doesn't leave residue. That’s why it's the standard choice for electronics contacts. You should let everything dry for a couple of minutes before placing the earbuds back in the case to charge.
Keeping the contacts clean is only one part of protecting battery health. Follow these charging and storage habits to make earbud batteries last longer.
Can You Use Alcohol to Clean Earbuds?
Sometimes—but not as a universal rule. Certain manufacturers allow a small amount of isopropyl alcohol on the charging case or selected exterior surfaces. Other manufacturers advise against alcohol or chemical agents on both the earbuds and case. Alcohol can also affect coatings, adhesives, plastics, and acoustic membranes. Use a dry method first and follow the exact instructions for your model. Never soak the mesh or pour alcohol directly onto any part.
Can You Wash IPX-Rated Earbuds?
An IPX rating describes resistance under specific laboratory conditions; it is not a general cleaning instruction. The rating may apply only to the earbuds, while the charging case may have a different rating or none at all. Water resistance can also decrease with wear or damage. Do not put earbuds under a tap, submerge them, or use soap unless the manufacturer explicitly approves that method for your exact model. For a clearer explanation of sweat and water protection, read our guide to earbud IPX ratings, including what IPX4, IPX5, IPX6, and IPX7 actually mean.
What You Should Never Use
Pins, needles, toothpicks, paperclips, or metal tools inside the mesh.
Bleach, perfume, glass cleaner, detergent, hydrogen peroxide, or household sprays.
Running water or submersion unless the exact model instructions permit it.
Hair dryers, heaters, direct sunlight, or other strong heat. Heat can deform parts, weaken adhesives, and damage the battery.
Canned compressed air or high-pressure air directed into openings.
Charging or using the earbuds before every cleaned part is fully dry.

Common Earbud Problems and What to Try
|
Problem |
Possible Causes |
First Steps |
|
One earbud is quieter |
Blocked mesh, poor fit, balance setting, moisture, software, or hardware fault |
Inspect and gently dry-clean the mesh, check audio balance and try another ear-tip size. |
|
Both sides sound muffled |
Debris, poor seal, EQ setting, low-quality source, or moisture |
Clean visible debris, reseat the tips, reset EQ, and test another device |
|
Earbud will not charge |
Dirty contact, misalignment, moisture, depleted case, or hardware issue |
Dry-clean contacts, reseat the earbud, charge the case, and let everything dry |
|
Microphone sounds unclear |
Blocked microphone port, wind, software mode, or connection issue |
Dry-clean the microphone opening and test call settings |
|
Ear irritation or smell |
Sweat, oil, damaged tips, trapped moisture, or sensitivity |
Stop use, clean or replace tips, and allow the area to recover. Seek medical care for pain, discharge, swelling, or persistent symptoms. |
Common Earbud Problems and What to Try Cleaning will not fix every sound problem. If the earbuds still sound wrong after cleaning, check the fit, phone settings, firmware, and connection. For feature-related confusion, the ANC vs ENC guide explains the difference between listening-side and microphone-side noise cancellation, while the Bluetooth codec guide explains why SBC, AAC, aptX, or LDAC may affect audio quality.

Recommended Cleaning Tools You Can Buy in Bangladesh
If you'd rather not improvise with things lying around the house, these are solid picks currently available from Bangladeshi retailers, chosen for value rather than just brand name.
|
Category |
Product |
Price (BDT) |
|
Best all-in-one kit |
৳ 990 |
|
|
Best budget pick |
৳ 650 |
|
|
Most tools in one box |
৳ 1,530 |
|
|
Best for precision cleaning |
৳ 1,299 |
The Baseus UltraClean 8-in-1 kit is the easiest all-in-one option, since it bundles a brush, swabs, and cleaning putty for less than the cost of a single meal out. If you only ever need to handle earbuds and don't want extra tools cluttering a drawer, the standalone Baseus brush covers that for under a thousand taka. For people who also clean keyboards, phones, and laptops, the 32-in-1 kit gives the widest coverage per taka spent.
How to Keep Earbuds Cleaner for Longer
Store earbuds in a clean, dry case after use.
Wipe sweat away before placing them in the case.
Keep the inside of your ears dry, but never insert cleaning tools into the ear canal.
Avoid handling the mesh with oily fingers.
Do not share in-ear tips when possible.
Replace damaged or poorly fitting tips instead of forcing them to last.
Cleaning Tools and Replacement Tips in Bangladesh
When buying a cleaning kit, choose one with a soft brush, microfiber cloth, and simple swabs. Avoid tools that encourage inserting metal picks into speaker or microphone openings. You can browse gadget accessories or compare wireless earbuds and audio products in Bangladesh when replacement tips, a new case, or a replacement pair is needed.
Frequently Asked Questions
You should wipe them after each use and do a full mesh cleaning weekly if you wear them on a regular basis.
Yes. Built-up wax blocks the mesh and muffles sound. If it isn’t taken care of, it can harden and become harder to remove without picking at the mesh, which risks damage.
Only removable silicone ear tips should touch water. The earbud body and charging case should never be submerged.
A small amount of 70% isopropyl alcohol on a cotton swab is fine for the case and contacts. Avoid soaking the mesh area in it.
This is almost always wax or dust blocking the mesh on one side. Clean that earbud's mesh first before assuming it's faulty.
Prolonged buildup of wax, sweat, and bacteria on ear tips can irritate the ear canal, especially with foam tips that aren't replaced regularly.